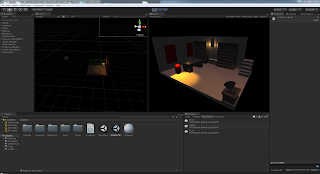
I wasn't sure whether i should be uploading my games project on my personal blog as well as the team blog i figured there was no harm in it so i will be uploading progress on my game on here as well now. These screen shots are examples of the game so far which were tested yesterday in the peer assessment session i will be uploading the feedback form later in the week as well.
In the game so far i have put a teleporter which allows the player to reach each room and move backwards and forwards between all rooms, also when the player moves from each room the camera moves to the room you are in as well.
Wednesday, 28 October 2015
Zbrush Lesson 5: Bee Subtool
In todays lesson we had slight problem with that robin had to go to a meeting during our lesson so we were just running through subtools again which was actually really useful because i was a bit confused with them last time so the second run through was useful.
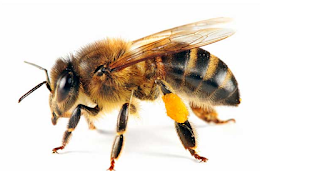
Im really looking forward to keep designing this bee just got the legs and butt subtools done.
Im really looking forward to keep designing this bee just got the legs and butt subtools done.
Unity Lesson 4: Navmesh Rotating Door
In yesterdays lesson we were learning how to code a rotating door with the Navmesh being involed which opens with a mouse hover click. In this we learned a really useful function which goes in the Gamemanger which you can just call to make and action on an object happen in the lesson we called it InteractGo. It was really fun as usual but it was defiantly the first time i got lost with following the code because of the amount EInumerators we had to make the door move but i feel like i can use/transfer the skills we used in the lesson to our game.
Games Art: Winter Project Part 3
Now nearing the deadline/milestone for the high polly model for our assets is supposed to be finished, i am not to worried about this deadline as i feel i am on track to finish, so far i am nearly ready to uv my model and do the final texturing in Zbrush the only feature i have left to do is the rest of the bars in the face mask and mirror the other half.
Wednesday, 21 October 2015
Unity Lesson 4: Raycast - MouseHover - GUI/UI
Im sorry for not uploading my other lessons only recently have i thought of doing the lesson as while of my game project and on the note as well i will be starting to upload things to do with my game as well now this blog not just on the team blog.
However back to the work in this lesson Ewen which teaching us more code to do with the ray cast and nav mesh features. In the code we were trying to make it so that then the mouse hovers over any object in the game in would show the name of the object but as a button from the new UI system.
 This was really fun just like all the other coding lesson and very useful so i will defiantly be trying to transfer this code in to our game.
However back to the work in this lesson Ewen which teaching us more code to do with the ray cast and nav mesh features. In the code we were trying to make it so that then the mouse hovers over any object in the game in would show the name of the object but as a button from the new UI system.
 This was really fun just like all the other coding lesson and very useful so i will defiantly be trying to transfer this code in to our game.
Zbrush Lesson 5: Free roam
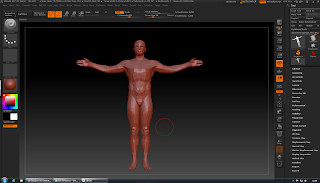
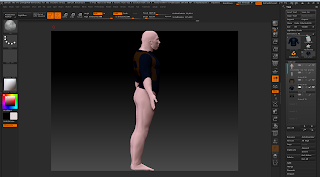
Today was another catch up lesson for other people so today was practicing my sculpting on a model in the Zbrush. I wanted to make a fat sumo wrestler/mafia boss because we always end up doing muscly people so i wanted to see how hard it is to model fat and turns our harder than you think, although i like the way the model has come out. Sadly i lost part of my modeling due to a crash so this shows the base model and then films shows after i finished the head.
Thursday, 15 October 2015
Games Art: Winter Project Part 2
After deciding on my Blood Bowl Helmet i was struggling with how to put in the references in Maya because i wasn't sure which angle to put it in as the shape is round, but a quick meeting with Phill we manage to come with the idea of putting the front and side image plans in for reference then model a sphere to the shape, cut one side out then model details on the helmet with quad draw. I am pleased with the way the model is going so far but its easy going at the start we shall see how the project progresses.
Games Arts: High Poly Practice Knife part 2
Now in to our 4th lesson i have finished the model in Maya and now uving it to get it ready for exporting it into Zbrush to add some detail to the model. I have actaully really been enjoying this project so far it has been great to practice for our winter games art project which i have just started modeling. The uving is not going well tho, some thing i got to remember to do in the winter project is to be careful when merging vertices because is in the knife there are some join vertices in the middle of the model and its near impossible to get good uvs out it. Other than that i think this work has gone well.
Wednesday, 14 October 2015
Zbrush Lesson 4: Free roam
In Robins Lesson today we final we given all of the licenses so everyone in class could get there hands on the software at once! So for the lesson it was voted that he should just do a quick run through of all the things he taught in the previous lesson so the others could catch up. I was lucky enough to be able to get Zbrush up every lesson so i was feeling pretty confidant.
So i went to practice model with Zpheres in the more high detail, i am really pleased with how it came out and i will continue to do the bee as a side project when i have the time.
Wednesday, 7 October 2015
Zbrush Lesson 3: Sub Tools
In today's lesson we were learning about sub tools in Zbrush we have had some interaction with this but no understand of them, the sub tools are everything in the model or on the model so if you have a head then you put sunglasses on them the sunglasses would be a sub tool. In the lesson we learnt how to use the masking tool to highlight some areas then extracted them into another sub tool which allows you to work straight of the model which is really quick and cool. you can then use the subtools as you would in the Photoshop layers. This is my attempt of messing with the masking tool, i was trying to make a futuristic police man with enhancements.
Thursday, 1 October 2015
Zbrush 3D Art: Zsphes Ancient Scorpoion
In yesterdays Zbrush lesson we were learn another workflow in the program this one allows you to model your designs with Zspheres. Zbrush then does the topology for you which is really useful, I have been loving this program even more now and I want to learn and practice more with it.
After you have modeled your piece with the spheres you can use an extra feature which allows you to add more detail without molding, I cant remember the name of the tool but it is actiavate by pressing shift + A in edit mode.
After you have modeled your piece with the spheres you can use an extra feature which allows you to add more detail without molding, I cant remember the name of the tool but it is actiavate by pressing shift + A in edit mode.
Zbrush: 3D Art Greek Head
This is a video of the making of the philosophers head i made, Plato would be jealous.
Subscribe to:
Comments (Atom)


